Have you ever admired a beautiful solid wood dining table? You probably wondered how the craftsman hid the seams perfectly. Creating wide wooden surfaces from narrow boards takes real practice. Beginners often face visible gaps and massive structural joint failures. Cupped panels can ruin your hard work instantly and completely. True perfection requires immense patience and proven reliable workshop techniques. Wide lumber is incredibly expensive and highly unstable by nature. Gluing narrow boards creates a much more stable final piece. Wood naturally expands and contracts with seasonal relative humidity changes. Joining multiple boards correctly distributes these natural physical wood stresses.
Today we explore Seamless Edge-to-Edge Panel Glue-Ups in fine detail. You will transform raw lumber into stunning unified flat surfaces. We will thoroughly learn how to create seamless edge to edge panel glue ups. This comprehensive guide answers your biggest questions with clear solutions. You will master the geometry and chemistry of wood joints. Let us dive right into the absolute best woodworking methods.
Preparing for Seamless Edge-to-Edge Panel Glue-Ups
Every great project starts by picking the best raw materials. Choosing boards wisely prevents nasty warping and deep structural cracks. You must inspect the structural integrity of every single board. Proper preparation saves you massive headaches down the long road. You also need a clean space for this complex work. Finding clever storage solutions to organize your wood shop helps immensely. A tidy shop gives you room to maneuver large panels. Your final layout dictates the ultimate beauty of your furniture. Let us explore the absolute best material selection practices today. You must carefully match wood tones for a beautiful appearance. Look closely at the grain patterns on every single board. The success of Seamless Edge-to-Edge Panel Glue-Ups heavily depends on preparation. Rushing this early phase always guarantees a failed final project.
Selecting Your Lumber Carefully
When you buy rough lumber, let it acclimate very slowly. Wood is a living material that absorbs local atmospheric moisture. If you build with damp wood, it will inevitably crack. Experts at the Forest Products Laboratory recommend highly specific levels. They suggest eight percent moisture content for interior home furniture. Taking time to measure this prevents total catastrophic project failures. You must use a digital moisture meter for true accuracy. Check multiple spots on every single board you plan to buy. Once your wood is totally stable, you can plan layouts. Beautiful Seamless Edge-to-Edge Panel Glue-Ups demand perfectly acclimated dry wood. Rushing this step guarantees future panel cupping and ruined furniture. Always stack your boards with thin wooden stickers between them. This allows dry air to circulate freely around all sides. The acclimation process can take several weeks for thick lumber. Patience is your greatest tool during this critical drying period.
Understanding alternating grain Patterns
A critical technique involves planning your final wood grain layout. Look at the end grain and flip alternating wood boards. This clever alternating grain trick cancels natural aggressive cupping forces. Growth rings naturally want to flatten as the wood ages. This simple method ensures your panels stay incredibly flat forever. You should draw a large triangle strictly across the boards. Use a thick carpenter pencil for this important registration mark. This mark helps you reassemble boards in the correct order. You will never mix up your carefully planned visual layout. It is a foolproof method used by seasoned woodworking professionals. Perfect Seamless Edge-to-Edge Panel Glue-Ups always rely on grain orientation. Mismatching the grain direction creates visual disharmony in the wood. You want the final panel to look totally smooth naturally. Spend extra time rotating boards until the pattern looks beautiful.
Milling Perfect jointed edges Every Time
Milling your lumber is the most important physical prep phase. If edges are not perfectly square, heavy clamping will fail. We must create tight geometry that mates wood fibers flawlessly. Professional furniture makers use highly specific machine techniques for this. Perfect jointed edges are the absolute secret to great joints. Some beginners wonder if alternative fast joining methods work well. They often ask if are pocket hole joints strong enough for heavy furniture building. Pocket holes are great for cabinets but poor for panels. Panel glue joints need massive continuous surface area for strength. Screws cannot replace the chemical bond of glued wood edges. Let us review the best practices for strict edge preparation. Flawless Seamless Edge-to-Edge Panel Glue-Ups demand invisible tight seam lines. The geometry must be absolutely perfect before any glue applies.
how to joint board edges straight for wide panels
The heavy jointer is your absolute best machine for this. A tuned jointer creates perfectly straight and perfectly square edges. You should feed boards very slowly to avoid milling marks. Slow feed rates prevent ugly surface tear out from happening. Some woodworkers prefer to use a highly tuned hand plane. A sharp hand plane can take a final continuous shaving. This removes machine marks and creates a pristine mating surface. Keep your hands firmly planted over the spinning cutter head. Consistent downward pressure is the true secret to joining success. You must keep the board flat on the rear table. Knowing how to joint board edges straight for wide panels is crucial. This guarantees your Seamless Edge-to-Edge Panel Glue-Ups will never fail. Check your machine fence with a precision engineer square regularly. A fence that is slightly off creates a bowed joint.
Using biscuit slots for Easy Alignment
Maintaining strict alignment during a messy glue up is challenging. Wet glue acts exactly like a slippery wet liquid lubricant. Boards love to slide around uncontrollably under very heavy pressure. This is where modern woodworking joinery methods truly shine brightly. Using a plate joiner to cut small oval biscuit slots helps. The compressed wooden biscuits swell when they absorb adhesive water. This strictly locks the boards flush during the clamping phase. It saves you many hours of brutal flattening work later. They do not add any structural strength to your joints. However, they are completely invaluable for fast alignment purposes alone. Perfect Seamless Edge-to-Edge Panel Glue-Ups stay flat with good alignment. Mark your slot locations with a dark pencil very clearly. Plunge the cutting machine firmly and squarely into the edge.
The Core Process of Wood Assembly
The stressful moment of truth arrives when you apply adhesive. The assembly phase is stressful due to highly limited time. Proper workshop preparation separates a messy disaster from flawless execution. Your workshop environment plays a massive role in overall success. Let us look at the ideal setup for panel assembly. You must have absolutely everything ready before opening the bottle. Successful Seamless Edge-to-Edge Panel Glue-Ups require total mental calm always. Organize your clamps and tools exactly where you need them. Do not answer your phone during this critical sticky process. A few lost minutes can completely ruin the entire project. Your glue will start to skin over and lose strength.
Setting Up Your flat surface
Before applying any adhesive, you need a perfectly flat surface. If your table is heavily bowed, your panel will bend. The glued panel inherits the exact curve of the surface. Many professionals build dedicated torsion box tables just for this. A thick torsion box stays dead flat under heavy weight. Once your workspace is ready, gather all your needed supplies. You need heavy clamps, a mallet, and clean wet rags. Do not forget your favorite bottle of strong wood adhesive. You should lay down thick craft paper to catch drips. Dried glue is very hard to scrape off wooden tables. A perfectly flat surface guarantees flat Seamless Edge-to-Edge Panel Glue-Ups. Check your assembly table with a long straight edge first. Shims can help level your table if it is uneven.
Applying Your wood glue Correctly
Using a high quality adhesive is strictly non negotiable today. Standard polyvinyl acetate glues provide a highly durable chemical bond. This strong chemical bond is actually stronger than wood itself. Apply a very even bead of wood glue along edges. You must spread this adhesive to achieve complete surface coverage. A silicone roller works perfectly for this specific sticky task. You can also use a cheap disposable metal acid brush. You are aiming for a thin, completely continuous wet film. Avoid leaving any dry spots on the joined wood face. Too much wood glue wastes material and creates terrible messes. Good Seamless Edge-to-Edge Panel Glue-Ups need the perfect glue volume. Bring your glued edges tightly together on your flat table. Rub the wood boards back and forth just a little bit. This helps distribute the glue evenly across both flat surfaces.
Crucial clamping tips for flat solid wood panels
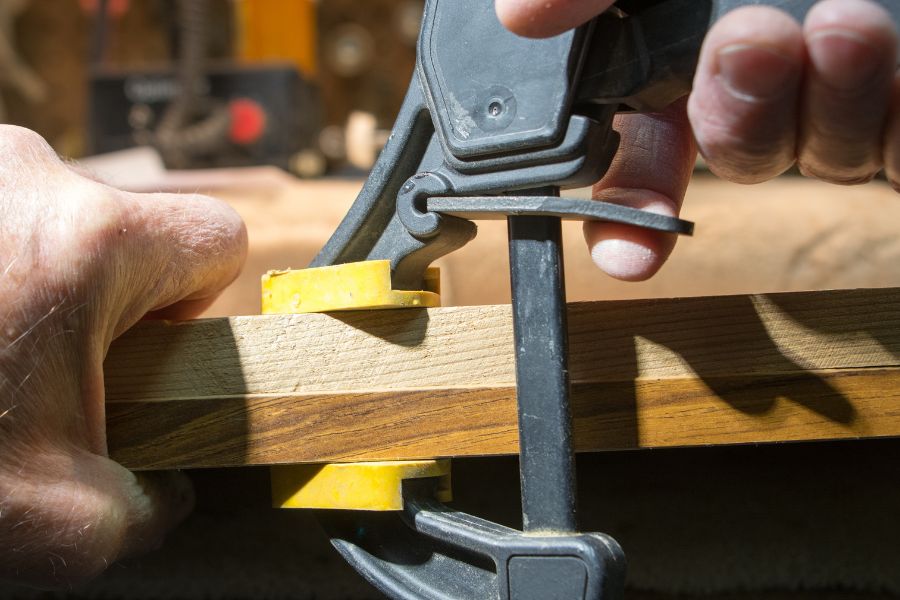
Applying the exact right pressure is a delicate balancing act. Too much pressure forces all adhesive out of the joint. Too little pressure leaves nasty gaps that ruin final aesthetics. Clamping correctly requires good heavy hardware and smart placement strategies. Here are the precise strategies you need for stress free clamping. Let us master the complex art of applying heavy pressure. We will explore the best clamping tips for flat solid wood panels. Perfect Seamless Edge-to-Edge Panel Glue-Ups demand excellent heavy clamp distribution. Uneven pressure causes the wet panel to buckle and distort. Learning clamp placement is a major milestone in your craft. Take your time to position every single clamp perfectly straight.
Utilizing Sturdy pipe clamps
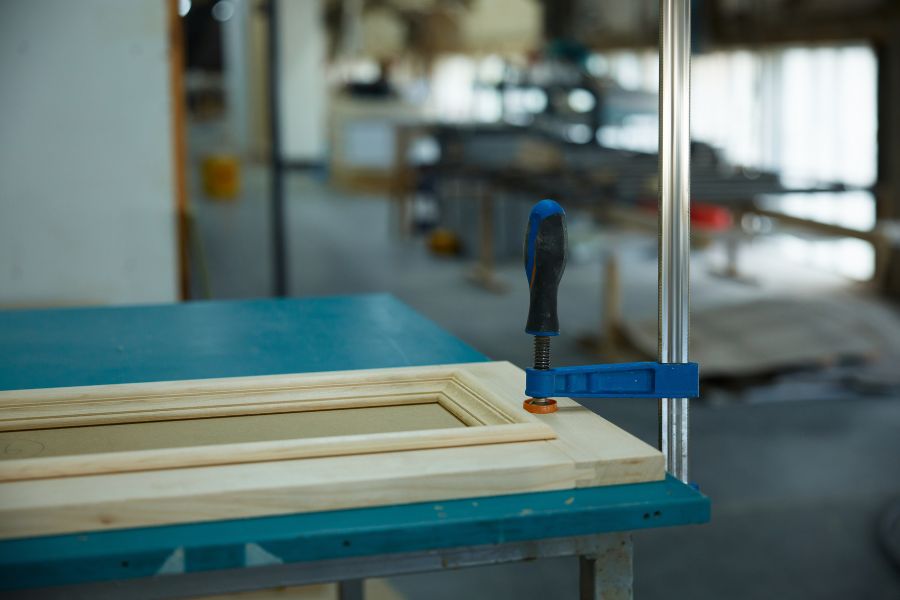
When building large thick tabletops, heavy duty hardware is required. Traditional black iron pipe clamps are the global industry standard. They are incredibly rigid, highly durable, and very affordable today. You can buy steel pipes in various lengths for projects. You simply screw the cast iron clamp fixture onto threads. Place your first heavy clamp directly underneath the wood panel. Space your bottom clamps about ten inches apart perfectly straight. Ensure the pipes are sitting totally flat on your table. This creates a solid level foundation for your wood panels. Some woodworkers wrap pipe clamps in tape to prevent stains. Iron pipes can leave dark black marks on wet oak. Your Seamless Edge-to-Edge Panel Glue-Ups will thank you for this. Always buy a few more heavy clamps than you need. You can never have too many clamps in a workshop.
Balancing Your Final Clamping Pressure
You must alternate your heavy clamps to prevent severe bowing. Place the exact next clamp directly on top of wood. This alternating pattern balances the massive pressure across the wood. It stops the entire wooden panel from popping upwards violently. Aim for firm, completely even pressure along the entire length. Stop tightening when you see small glue beads squeeze out. If the wood distorts, back off the iron tension immediately. Using thick wooden cauls is another brilliant professional clamping technique. You clamp stiff wooden bars strictly across the panel width. They force the individual boards to remain perfectly flush together. Proper pressure ensures your Seamless Edge-to-Edge Panel Glue-Ups cure completely flat. Tape your wooden cauls so they do not glue down. Tighten the cauls first before applying massive horizontal clamping pressure.
Refining and Smoothing Your Solid Panels
The glue has totally dried and you removed the clamps. However, the hard job is not quite finished for craftsmen. The final critical leveling steps elevate a good project greatly. You must refine the raw surface until seams totally disappear. This requires sharp steel hand tools and heavy sanding machines. Let us perfect the surface of your massive new tabletop. We are achieving invisible glue lines in tabletop manufacturing right now. Great Seamless Edge-to-Edge Panel Glue-Ups look like a single tree. Patience during this finishing phase yields highly spectacular visual results. Do not rush the final sanding process under any circumstances. Take pride in making the surface perfectly smooth like glass.
The Magic of a Sharp scraper blade
Managing glue squeeze out correctly saves you massive sanding time. Waiting until the glue becomes rubbery is the best method. You can easily peel it away with a blunt knife. Once the panel cures completely overnight, reach for sharp tools. A traditional steel scraper blade is perfect for dried glue. This simple square of steel shaves off hard glue droplets. It removes hard droplets without tearing surrounding soft wood fibers. It leaves a remarkably smooth wooden surface behind very quickly. This is far more efficient than using rough coarse sandpaper. Every professional uses a scraper blade for finishing wooden panels. It reveals the true beauty of Seamless Edge-to-Edge Panel Glue-Ups. Sharpening this tool requires a highly specialized steel burnisher rod. Learning to sharpen it is a truly valuable workshop skill.
Mastering the random orbital sander
After leveling glue lines, begin the final mechanical surfacing phase. A random orbital sander brings the panel to a finish. Start with an eighty grit abrasive to level slight mismatches. Move steadily through the grits without skipping any steps ever. Go from eighty to one hundred and twenty grit paper. Then move smoothly to one hundred and fifty grit paper. Skipping grits leaves deep circular mechanical scratches in the wood. Always keep the random orbital sander moving flat against wood. Never tip it on edge to remove a stubborn stain. This final sanding masters achieving invisible glue lines in tabletop manufacturing. Your Seamless Edge-to-Edge Panel Glue-Ups are now ready for rich finish. Connect your machine to a vacuum for safe dust extraction. Good dust collection keeps your sandpaper cutting aggressively and cleanly.
Fixing Mistakes in Solid Wood Assemblies
Even professionals make silly mistakes during complex panel assembly processes. Sometimes a joint fails or a tiny gap remains visible. You do not have to throw the expensive wood away. There are proven methods to fix these highly frustrating errors. Learning recovery techniques makes you a much better smart woodworker. Let us look at how to salvage a ruined panel. Even flawed Seamless Edge-to-Edge Panel Glue-Ups can be completely rescued. Wood is forgiving if you know the right secret tricks. Never throw away a panel before trying to fix it. We can fill gaps and flatten severe warps very effectively. Let us master these crucial advanced panel repair workshop techniques.
Dealing With Stubborn Visible Gaps
Sometimes a tiny gap appears at the board ends naturally. A classic trick involves rubbing fine wood dust into glue. You mix fresh sanding dust with a little wet adhesive. Push this thick paste directly into the visible wood gap. The sawdust perfectly matches the surrounding wood color very naturally. It acts as a brilliant and natural invisible wood filler. Sand the area totally flat once the paste dries completely. Another option is using a specialized tinted synthetic wood filler. Apply the filler before the final heavy sanding phase begins. The best Seamless Edge-to-Edge Panel Glue-Ups rarely need any filler. Practice milling on cheap scrap wood to improve your skills. Perfect joinery takes months of dedicated practice to fully master. Do not get discouraged by early mistakes in the shop.
Handling Severe Cupping and Warping
If your panel cups heavily overnight, do not panic immediately. First, check the exact moisture content of your workshop environment. Sometimes placing the panel on wet morning grass fixes it. The dry cupped side absorbs moisture and totally flattens out. This is an old clever trick used by seasoned carpenters. If that fails, you might need heavy machinery help today. A massive wide belt sander can flatten warped panels instantly. Many local cabinet shops will rent time on theirs cheaply. You can also build a custom wooden router sled jig. A router sled uses a flat track to mill perfectly. It slowly shaves the warped Seamless Edge-to-Edge Panel Glue-Ups flat again. Secure the panel totally flat before using the router sled. Take very shallow passes to avoid tearing the wood fibers.
Frequently Asked Questions About Panel Assemblies
How long should I leave my panel in clamps?
You should keep it tightly clamped for two full hours. Most standard glues require this time for safe workable strength. Wait twenty four hours before machining the panel heavily.
Why did my flat panel cup after removing clamps?
Cupping occurs because glue moisture swells wood unevenly right there. It happens if your lumber was not completely dried initially. Let glued panels rest on wooden stickers for good airflow.
Can I use wooden dowels instead of thin biscuits?
Yes, dowels are an excellent alternative for safely aligning boards. Hardwood dowels provide significantly more structural strength than thin biscuits. Ensure your drilling jig is perfectly calibrated for true accuracy.
What is the best way to clean dirty clamps?
Preventing the sticky mess is always easier than cleaning it. Apply clear masking tape to metal bars before assembly begins. Scrape dried glue off gently with a stiff wire brush.
Is it possible to glue up wide panels simultaneously?
Gluing massive wide panels all at once is highly risky. A safer approach is gluing smaller two board sections first. Join the wider pieces together later with much less panic.